With a Clicker subscription, you have access to all three Clicker Apps – Clicker Writer, Clicker Books, and Clicker Talk – on iPads and Chromebooks.
Saving Clicker files
Save a Clicker Document
(Clicker Writer)
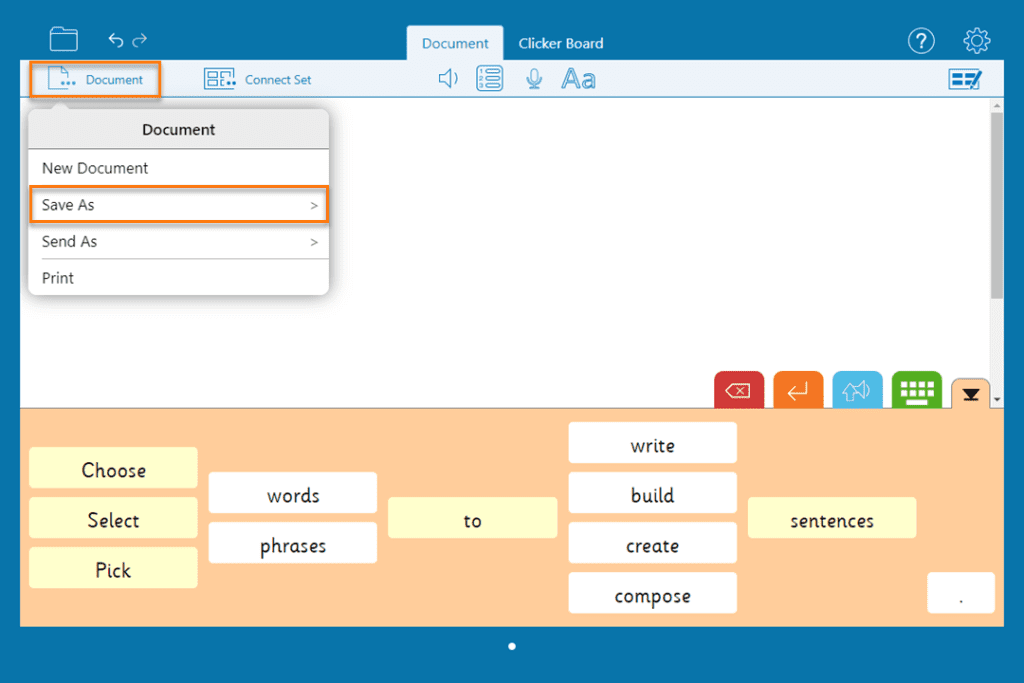
Save a student’s Clicker Document to continue their writing later:
- Tap
 and choose Save As.
 - Choose in which format you want to save the Document.
- Navigate to your local storage or cloud storage to choose where your Document will be saved.
- Tap and select My Files to open a previously saved Document.
 and choose Save As.
 and select My Files to open a previously saved Document.
Save a writing grid
(Clicker Writer)
Save a writing grid that you’ve created or edited:
- Tap and choose Save As.
- Navigate to your local storage or cloud storage to choose where your writing grid will be saved.
- Tap and select My Files to open a previously saved writing grid.
 and choose Save As.
Save a Clicker Board
(Clicker Writer)
Save a Clicker Board that you’ve created or edited:
- Tap and choose Save As.
- Navigate to your local storage or cloud storage to choose where your Clicker Board will be saved.
- Tap and select My Files to open a previously saved Clicker Board.
 and choose Save As.
Save a Clicker Book
Save a Clicker Book that you’ve created or edited:
- In the Clicker Books app:
- If hidden, tap to open the toolbar.
- Tap and choose Save As.
- If hidden, tap
- Navigate to your local storage or cloud storage to choose where your Clicker Book will be saved.
- Tap and select My Files to open a previously saved Clicker Book.
 to open the toolbar.
 and choose Save As.
 and select My Files to open a previously saved Clicker Book.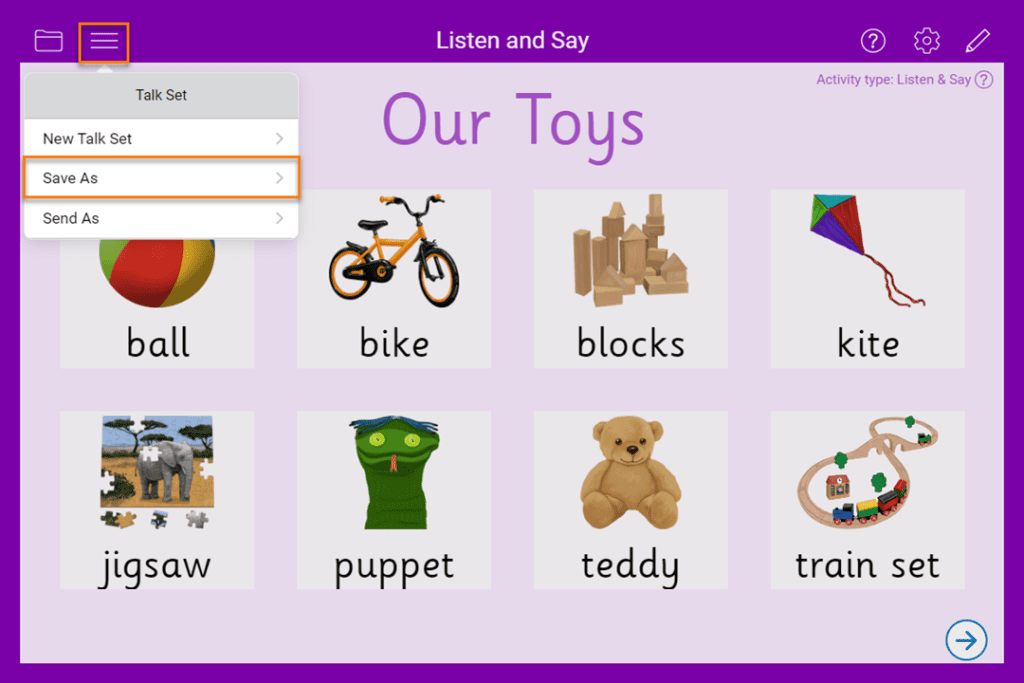
Save a Talk Set
Save a Talk Set that you’ve created or edited:
- In the Clicker Talk app:
- If hidden, tap to open the toolbar.
- Tap and choose Save As.
- If hidden, tap
- Navigate to your local storage or cloud storage to choose where your Talk Set will be saved.
- Tap and select My Files to open a previously saved Talk Set.
 to open the toolbar.
 and choose Save As.
 and select My Files to open a previously saved Talk Set.
Sharing Clicker files
Share a Clicker file to open it on another device or make it available to other staff and learners.
Share via email

Share a Clicker Document
(Clicker Writer)
- Tap and choose Send As.
- Choose in which format you want to share your Document.
- On the iPad sharing menu, choose Mail or your regular email app.
- A blank email will appear with your file attached.

Share a writing grid
(Clicker Writer)
- Tap and choose Send As.
- On the iPad sharing menu, choose Mail or your regular email app.
- A blank email will appear with your writing grid file attached.

Share a Clicker Board
(Clicker Writer)
- Tap and choose Send As.
- On the iPad sharing menu, choose Mail or your regular email app.
- A blank email will appear with the Clicker Board file attached.

Share a Clicker Book
- Tap and choose Send As.
- Choose in which format you want to send your Clicker Book.
- On the iPad sharing menu, choose Mail or your regular email app.
- A blank email will appear with your Clicker Book file attached.

Share a Talk Set
- Tap and choose Send As.
- On the iPad sharing menu, choose Mail or your regular email app.
- A blank email will appear with your Talk Set file attached.
Share via cloud storage

Once you have cloud storage installed on your devices, saving a file using one device will automatically sync it to the others. You’ll need to install the cloud provider’s app on your iPad and link the cloud app to the Apple Files app. Ask the person responsible for IT in your school to set this up.
- To share via cloud storage, choose the Save As option from the menu in any of the Clicker Apps.
- This will open the Files app. Navigate to your cloud folders using the options in the sidebar.
Share via AirDrop
You can use the AirDrop feature of your iPad to wirelessly share files with another iPad or Mac. See our support article for more useful information on how to share files via AirDrop.
Share a Clicker Document
(Clicker Writer)
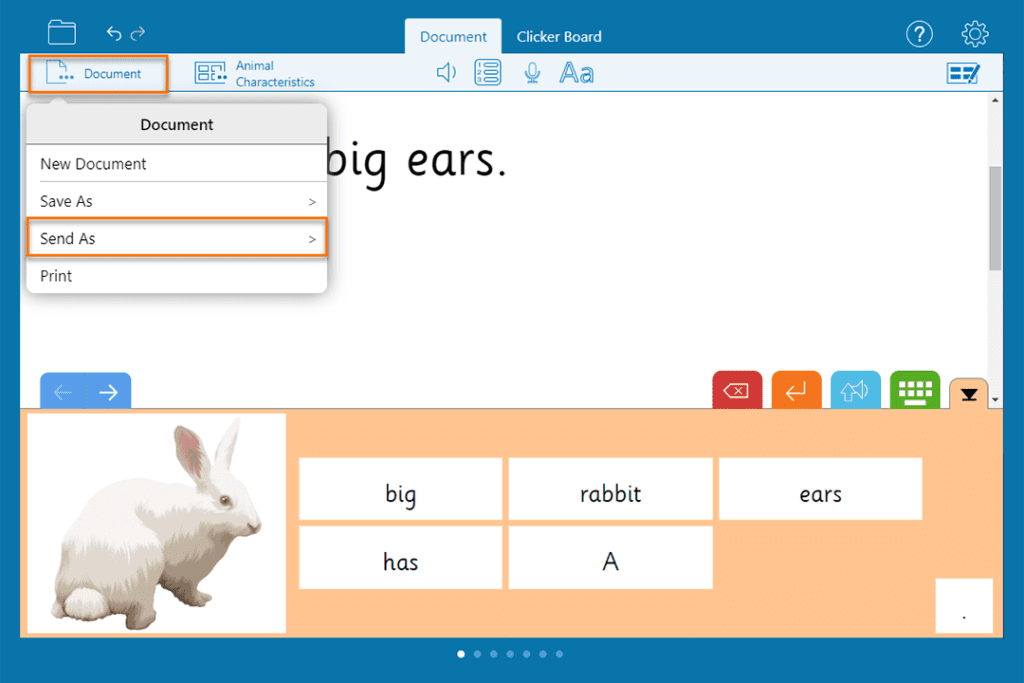
- Tap and choose Send As.
- In the iPad sharing menu, choose AirDrop and choose the device to send to.
Share a writing grid
(Clicker Writer)
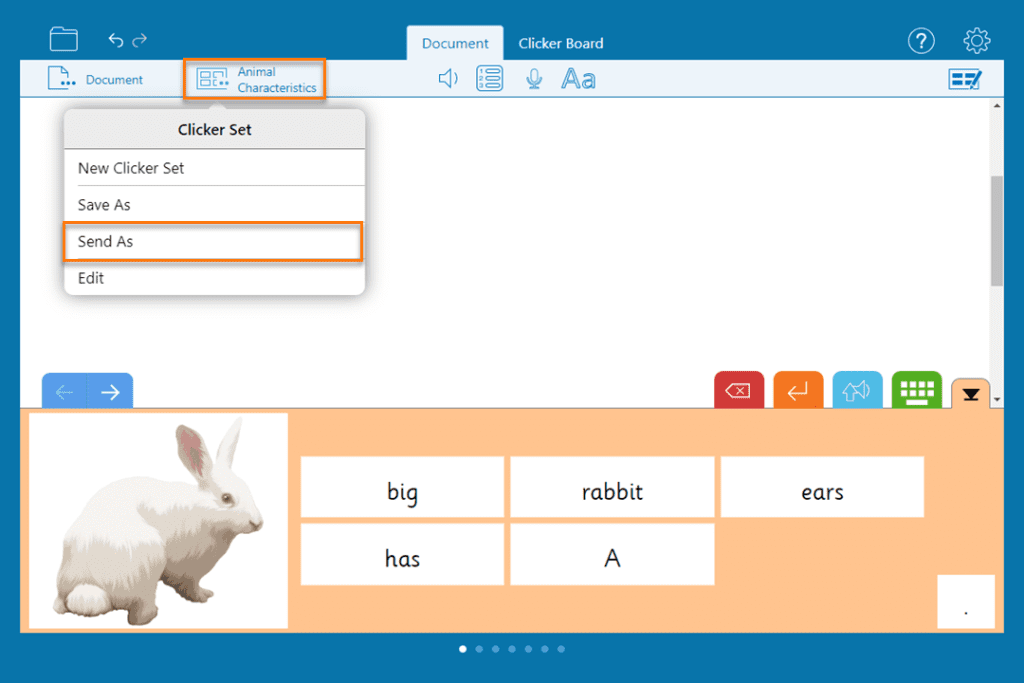
- Tap and choose Send As.
- In the iPad sharing menu, choose AirDrop and choose the device to send to.
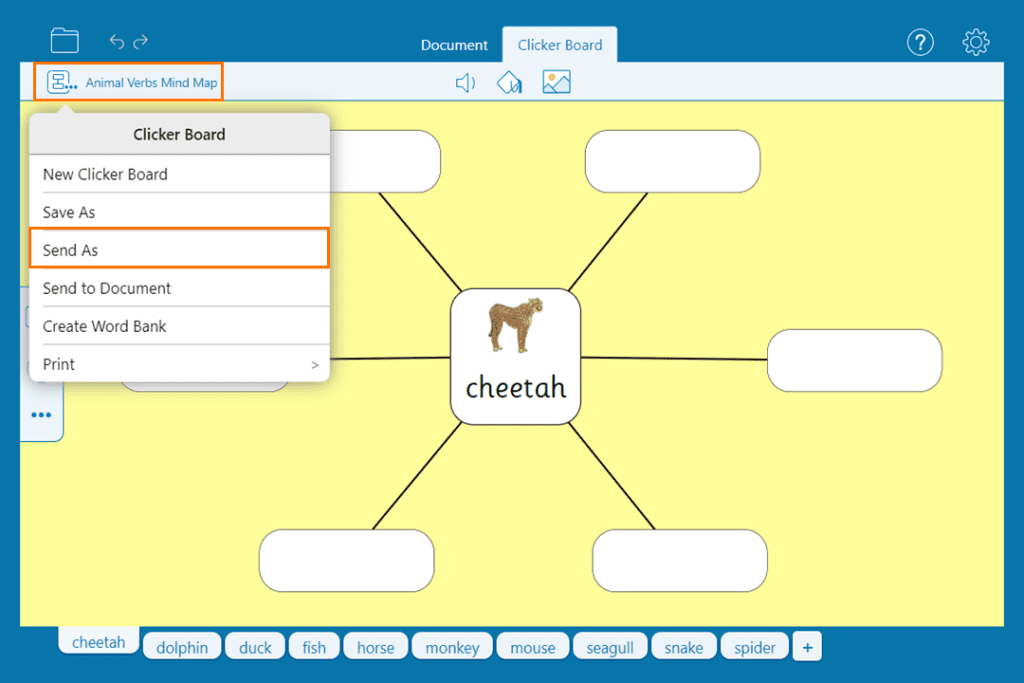
Share a Clicker Board
(Clicker Writer)
- Tap and choose Send As.
- In the iPad sharing menu, choose AirDrop and choose the device to send to.
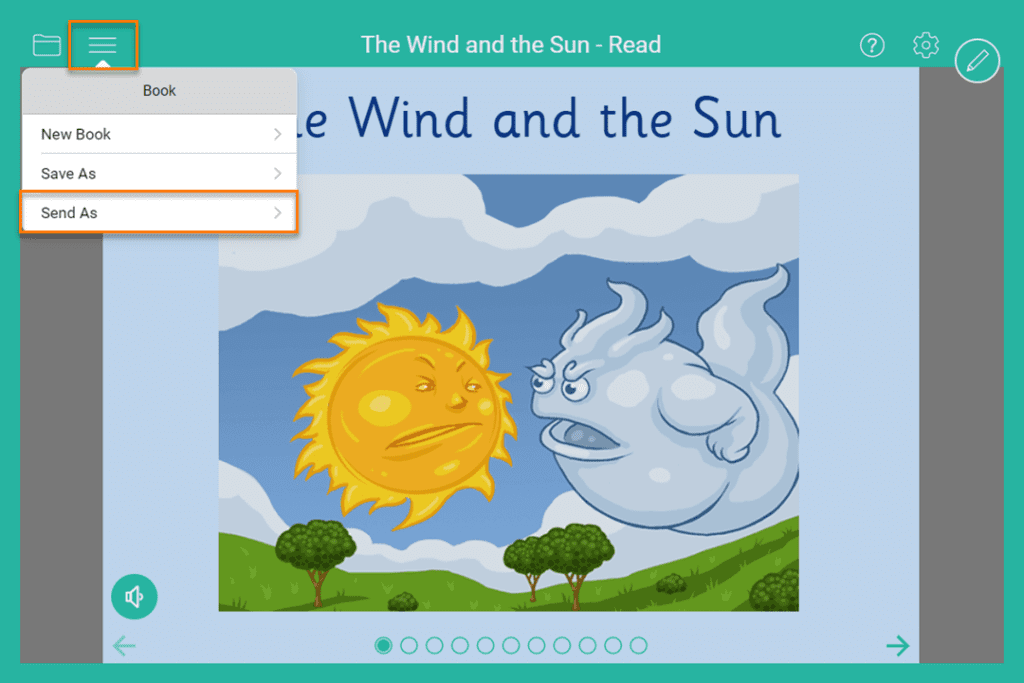
Share a Clicker Book
- Tap and choose Send As.
- In the iPad sharing menu, choose AirDrop and choose the device to send to.

Share a Talk Set
- Tap and choose Send As.
- In the iPad sharing menu, choose AirDrop and choose the device to send to.
Top tips
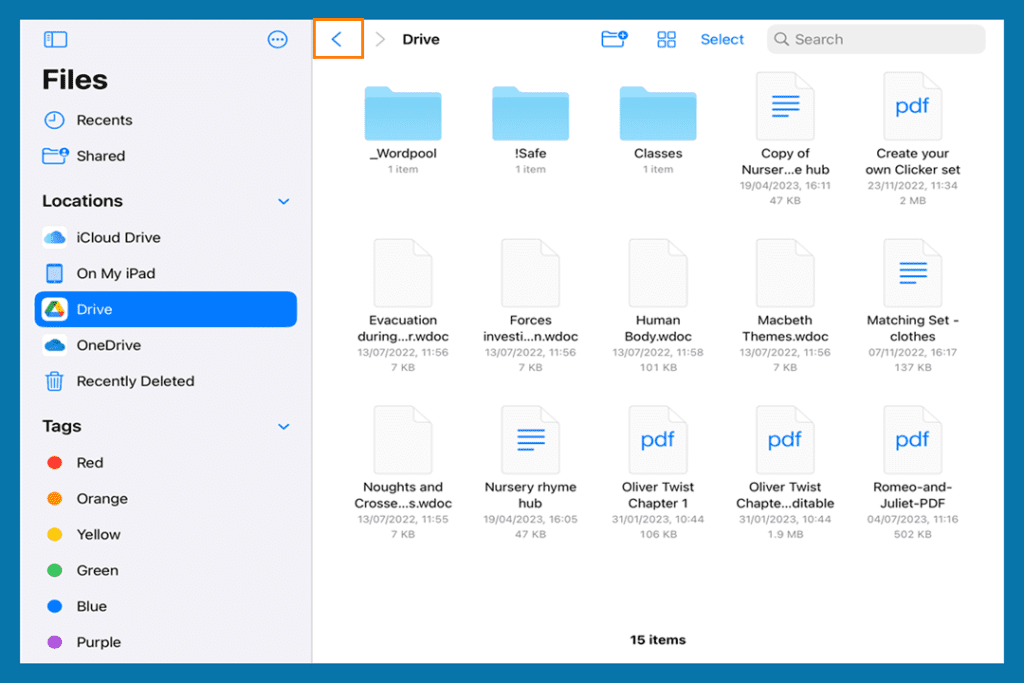
Open a Document or Clicker Set from Cloud Storage
- Open your iPad’s Files App.
- In the top-left corner, tap < until you see the sidebar.
- Select your cloud app.
- Browse to your file and tap to open it.
- You can also open files from within the Clicker Apps. To do this, tap and choose My Files.
- Browse to your file and tap to open it.
 and choose My Files.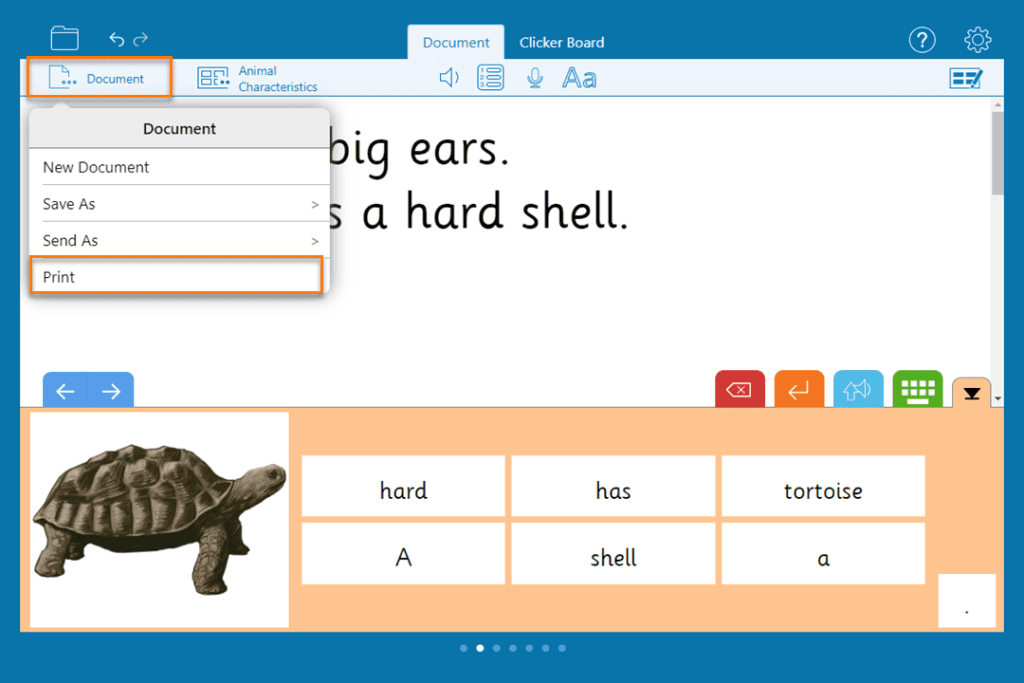
Print a Clicker Document
(Clicker Writer)
Print student’s work to keep a physical record of their progress:
- Select and choose Print.
- This will then open your print options.

Save as type
(Clicker Writer)
- Tap and choose Save As.
- Choose to save your document as a Clicker file, a Microsoft word document, or a PDF.
- If you choose to save as a Word Document or PDF, you will be able to access the document on a device that doesn’t have Clicker installed. However, you will lose any Voice Notes in the document - to keep these, always save your document as a Clicker Document.
Share via Google Classroom
- To share a Clicker file using Google Classroom, you will need to attach it to the relevant assignment.
- Download the file before opening it in Clicker.
- See our support article for step-by-step instructions on how to do this.
Share via Microsoft Teams
- To share Clicker files through Microsoft Teams, choose Send As from the menu in the Clicker App.
- In the iPad sharing menu, choose Teams.
- Search for the person or channel you want to share the file with.
- Tap the send icon in the top-right of the window.